Implementing LDAP Authentication in Laravel: A Guide to Using OpenLDAP, PHPLdapAdmin, and Docker with the LdapRecord Package
Introduction
Authentication through LDAP is a common way for organizations to manage user login information. LDAP (Lightweight Directory Access Protocol) is a protocol that helps keep track of usernames, passwords, and other important user details in a central directory server. This makes it easier for companies to control who can access what across different apps and services.
OpenLDAP is one implementation of the LDAP protocol. It’s an open-source software that anyone can use and modify. Another popular implementation of LDAP is Microsoft Active Directory, which is used by many businesses to manage user accounts and permissions within their Windows environments.
By using LDAP implementations like OpenLDAP or Active Directory, organizations can simplify user management and provide a single sign-on experience for their users. This means that users can log in once and access multiple resources without having to remember separate usernames and passwords for each one.
In this article, we’ll use Laravel to implement LDAP authentication, but remember that LDAP is flexible and can work with many other frameworks and backends too.
LDAP’s authentication workflow
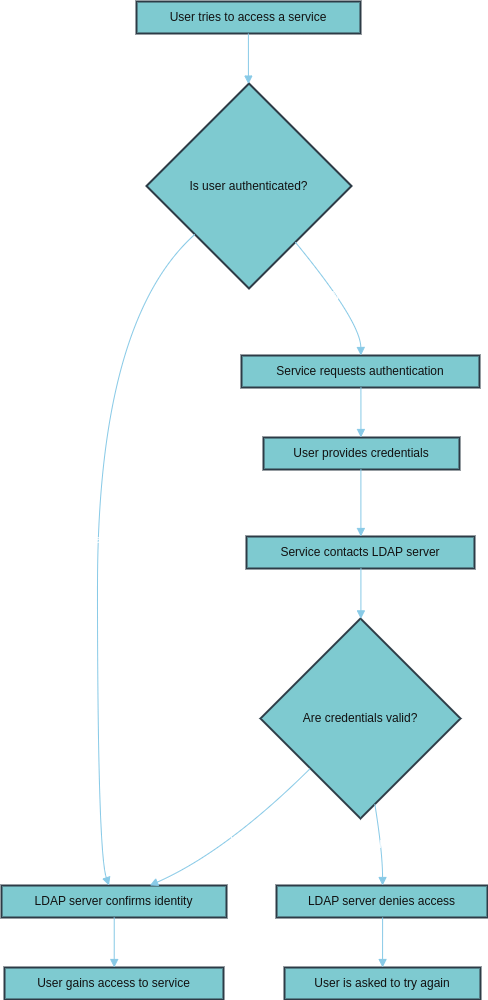
LDAP’s authentication workflow begins when a user tries to access a service. The service checks if the user is already authenticated. If not, the user is prompted to provide their credentials, usually a username and password.
The service then sends these credentials to the LDAP server for verification. The LDAP server compares the provided credentials against the user information stored in its directory. If the credentials match, the LDAP server confirms the user’s identity to the service, granting them access.
However, if the credentials are invalid, the LDAP server denies access, and the user is asked to try again. This centralized authentication process simplifies access management and ensures consistent security across multiple applications connected to the LDAP directory.
The following diagram illustrates the LDAP journey starting:
Basic LDAP Terminologies
Distinguished Name (DN): The DN is a unique identifier for each entry in an LDAP directory, serving as a complete path from the top-level root to the specific entity. For example, the DN for a user named Rishabh might be: cn=admin,dc=anq,dc=com.
LDAP Domain: This is the top-most level of an organization’s directory structure in LDAP. An example of an LDAP domain could be: dc=anq,dc=com.
Base DN: During an LDAP search for a particular entry, the Base DN represents the starting point from which the search begins. For instance, a Base DN for searching user entries might look like: ou=users,dc=anq,dc=com.
Bind DN: Before carrying out any operations like lookup, insertion, or modification in LDAP, one needs to authenticate. The Bind DN is an entry that has the necessary permissions to authenticate and perform these tasks within LDAP. A Bind DN example would be: cn=admin,dc=anq,dc=com.
LDIF (LDAP Data Interchange Format): An LDIF file is a standard plain text format used to represent directory entries. This format can be used to craft an LDIF file that defines a series of entries, which can then be imported to populate an LDAP server.
Prerequisites
- Docker:
- Install Docker to create isolated environments (containers) for OpenLDAP and PHPLdapAdmin.
- Docker documentation: Get Started with Docker
2. Composer:
- Install Composer, a dependency manager for PHP, to install Laravel and LdapRecord package.
- Composer documentation: Composer Getting Started
3. PHP:
- Ensure the latest PHP (8.3 ≥) is installed, as it is required to run Laravel and to execute Composer commands.
- PHP documentation: PHP Manual
4. Laravel:
- Knowledge of setting up a Laravel project is essential.
- Laravel installation guide: Installing Laravel
5. LdapRecord Package:
- Understanding of how to install and configure third-party packages in Laravel.
- LdapRecord documentation: LdapRecord Documentation
After installing these prerequisites, you’ll have a working environment to implement LDAP authentication in your Laravel application using OpenLDAP and Docker through the LdapRecord package.
Setting Up the Environment
Begin by setting up your environment for LDAP authentication in Laravel. First, clone the GitHub repository containing the configuration files for OpenLDAP and PHPLdapAdmin.
https://github.com/anqorithm/Laravel-OpenLDAP
Open your terminal, and run the git https://github.com/anqorithm/Laravel-OpenLDAP command followed by the repository URL. Once the repository is successfully cloned, change your directory to openldap by typing cd openldap in the terminal.
You will find the folder structure is the following:
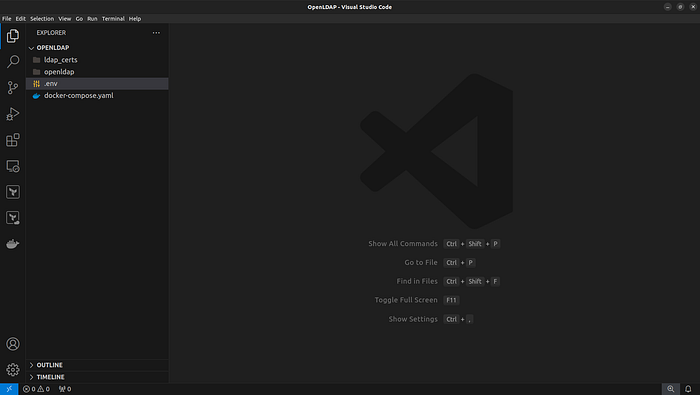
In this directory, you will find the .env file. Edit this file with your specific details to configure the environment variables for your LDAP services. This step is essential to tailor the setup to your particular needs and ensure that the services can communicate correctly.
# LDAP log level (256 is typically informational logging without debug)
LDAP_LOG_LEVEL=256

# The name of your organization - this will often appear in management interfaces or LDAP utilities
LDAP_ORGANISATION="Abdullah Alqahtani"

# Your Internet domain - this should match with the domain you want to use for LDAP
LDAP_DOMAIN=anq.com

# The Base Distinguished Name, should align with the domain - this is the starting point for directory tree structure
LDAP_BASE_DN="anq,dc=com"

# Password for the admin user - it's very important to change this to a secure password in production
LDAP_ADMIN_PASSWORD=anq

# Password for the config user - used for initial configuration of LDAP, should also be a secure password
LDAP_CONFIG_PASSWORD=config

# Whether to create a read-only user - set to "true" or "false"
LDAP_READONLY_USER=false

# Whether to use the RFC2307BIS schema - it changes the object class of groups from posixGroup to groupOfMembers
LDAP_RFC2307BIS_SCHEMA=false

# The database backend to use - mdb is a modern, high-performance storage engine
LDAP_BACKEND=mdb

# Whether to enable TLS - set to "true" to enable encryption
LDAP_TLS=true

# The filename for the TLS certificate - this should be in the same directory as the LDAP server's config files
LDAP_TLS_CRT_FILENAME=ldap.crt

# The filename for the TLS key - must be kept secure and private
LDAP_TLS_KEY_FILENAME=ldap.key

# The filename for the Diffie-Hellman parameter - used for setting up the secure TLS connection
LDAP_TLS_DH_PARAM_FILENAME=dhparam.pem

# The filename for the TLS Certificate Authority certificate - used for validating client certificates
LDAP_TLS_CA_CRT_FILENAME=ca.crt

# Whether to enforce client certificates - set to "true" to require clients to present a valid certificate
LDAP_TLS_ENFORCE=false

# The cipher suite for TLS - here, selecting secure ciphers while excluding SSL 3.0
LDAP_TLS_CIPHER_SUITE=SECURE256:-VERS-SSL3.0

# The level of verification for TLS client certificates - "demand" means client must present a valid certificate
LDAP_TLS_VERIFY_CLIENT=demand

# Whether to enable replication - set to "true" to enable LDAP replication
LDAP_REPLICATION=false

# Whether to keep existing config if found - if set to "false", the LDAP server will generate new configs on startup
KEEP_EXISTING_CONFIG=false

# Whether to remove the config after setup - helps with ensuring a clean state on startup
LDAP_REMOVE_CONFIG_AFTER_SETUP=true

# Prefix for the SSL helper tool - relevant for certain LDAP utilities
LDAP_SSL_HELPER_PREFIX=ldap
for more details and configurations please visit:
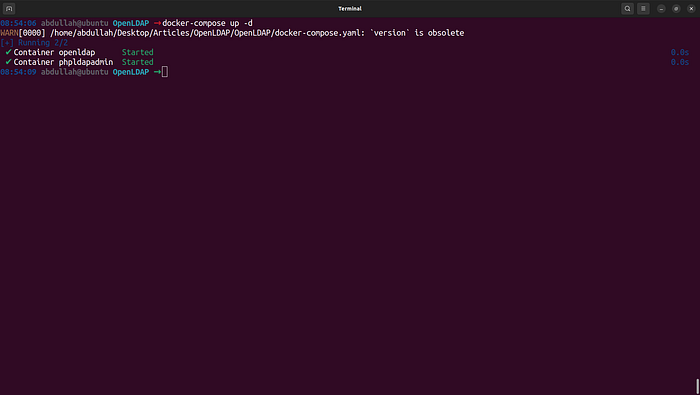
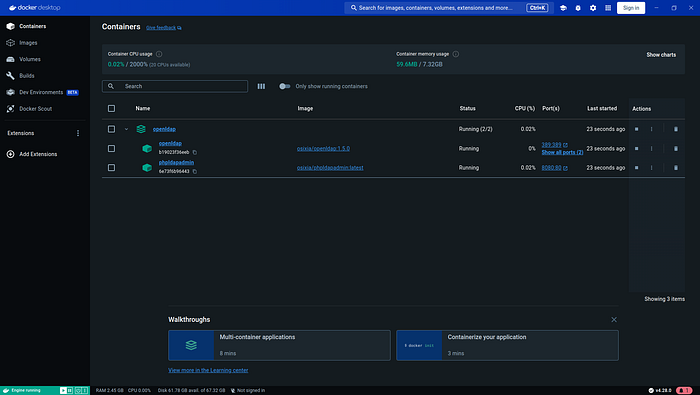
After configuring your environment, it’s time to start the services using Docker. Run the command docker-compose up from within the openldap directory. This command will read the docker-compose.yml file and create the necessary containers for your LDAP setup. Wait for Docker to finish spinning up the containers, which may take a few minutes.
The provided docker-compose file orchestrates the deployment of two services: openldap and phpldapadmin. The openldap service uses the osixia/openldap:1.5.0 Docker image to create a container named openldap, which is configured via an environment file and has its data volumes and ports set up to persist data and interface with the host system on standard LDAP ports.
The phpldapadmin service employs the osixia/phpldapadmin image to set up a web UI for managing the LDAP server, linking it to the openldap service as its host. It exposes its web interface on the host’s port 8080, allowing users to interact with it through a web browser. The depends_on directive ensures that phpldapadmin is started only after the openldap service is up and running.
This is the docker-compose.yaml
version: '3.8'

services:
  openldap:
    image: osixia/openldap:1.5.0
    container_name: openldap
    env_file:
      - .env
    tty: true
    stdin_open: true
    volumes:
      - /var/lib/ldap
      - /etc/ldap/slapd.d
      - /container/service/slapd/assets/certs/
    ports:
      - "389:389"
      - "636:636"
    domainname: "example.org"
    hostname: "ldap-server"
  phpldapadmin:
    image: osixia/phpldapadmin:latest
    container_name: phpldapadmin
    environment:
      PHPLDAPADMIN_LDAP_HOSTS: "openldap"
      PHPLDAPADMIN_HTTPS: "false"
    ports:
      - "8080:80"
    depends_on:
      - openldap
Once the containers are running, perform a health check to confirm that the services are active and operational. Docker provides commands to inspect the status of your containers, ensuring they are in good health and ready to use.
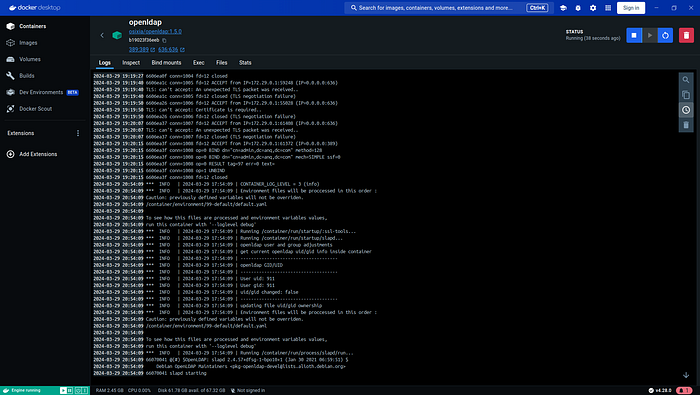
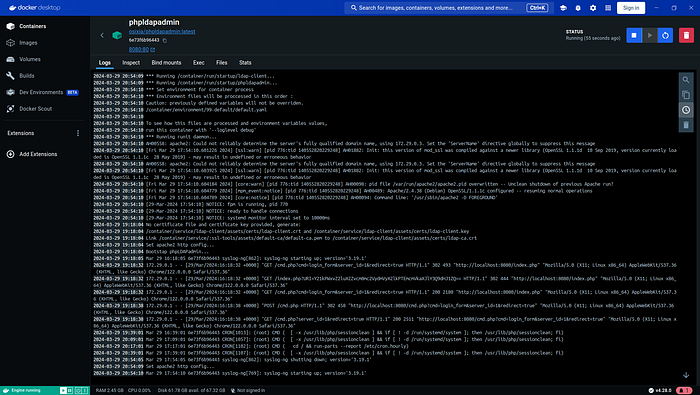
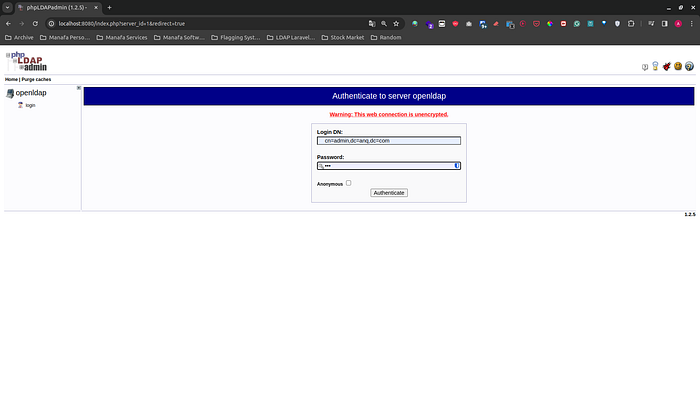
Next, verify that OpenLDAP is functioning correctly by testing its connectivity. Ensuring that OpenLDAP is responsive is crucial before proceeding further. Following this, ensure PHPLdapAdmin is accessible on your local machine. Open your web browser and navigate to localhost:8080 to reach the PHPLdapAdmin login page. Use the login credentials, the DN (Distinguished Name), and the password you specified in the .env file to log in.

$ docker exec openldap ldapsearch -x -H ldap://localhost -b dc=anq,dc=com -D "cn=admin,dc=anq,dc=com" -w anq
In our .env file the BASE_DN anq,dc=com so the LOGIN_DN will be cn=admin,dn=anq,dn=com and the PASSWORD will be anq
The last step in the environment setup is to populate the OpenLDAP database with users and groups. Import the LDIF schema, which contains predefined user and group entries, into OpenLDAP through PHPLdapAdmin. With the successful importation of this data, your LDAP service is now equipped with initial entries you can use for authentication.
anq.entries.ldif file
dn: ou=Engineering,dc=anq,dc=com
objectClass: organizationalUnit
ou: Engineering

dn: ou=Product,dc=anq,dc=com
objectClass: organizationalUnit
ou: Product

dn: ou=Financial Analysis,dc=anq,dc=com
objectClass: organizationalUnit
ou: Financial Analysis

dn: uid=abdullah.alqahtani,ou=Engineering,dc=anq,dc=com
objectClass: inetOrgPerson
objectClass: posixAccount
objectClass: shadowAccount
uid: abdullah.alqahtani
sn: Alqahtani
givenName: Abdullah
cn: Abdullah Alqahtani
displayName: Abdullah Alqahtani
uidNumber: 10000
gidNumber: 5000
userPassword: {SSHA}5ravvW53pHzMCUBPjTyf3Tnph0GHrpn7
gecos: Abdullah Alqahtani
loginShell: /bin/bash
homeDirectory: /home/abdullah.alqahtani

dn: uid=mohammed.ahmed,ou=Product,dc=anq,dc=com
objectClass: inetOrgPerson
objectClass: posixAccount
objectClass: shadowAccount
uid: mohammed.ahmed
sn: Ahmed
givenName: Mohammed
cn: Mohammed Ahmed
displayName: Mohammed Ahmed
uidNumber: 10001
gidNumber: 5000
userPassword: {SSHA}5ravvW53pHzMCUBPjTyf3Tnph0GHrpn7
gecos: Mohammed Ahmed
loginShell: /bin/bash
homeDirectory: /home/mohammed.ahmed

dn: uid=fatima.ali,ou=Financial Analysis,dc=anq,dc=com
objectClass: inetOrgPerson
objectClass: posixAccount
objectClass: shadowAccount
uid: fatima.ali
sn: Ali
givenName: Fatima
cn: Fatima Ali
displayName: Fatima Ali
uidNumber: 10002
gidNumber: 5000
userPassword: {SSHA}5ravvW53pHzMCUBPjTyf3Tnph0GHrpn7
gecos: Fatima Ali
loginShell: /bin/bash
homeDirectory: /home/fatima.ali
After clicking proceed >>
Now, I will execute the same query above to get all records again, and check that the users are added to the OpenLDAP
$ docker exec openldap ldapsearch -x -H ldap://localhost -b dc=anq,dc=com -D "cn=admin,dc=anq,dc=com" -w anqAfter executing the command, this is the response I get from the terminal:
# extended LDIF
#
# LDAPv3
# base <dc=anq,dc=com> with scope subtree
# filter: (objectclass=*)
# requesting: ALL
#

# anq.com
dn: dc=anq,dc=com
objectClass: top
objectClass: dcObject
objectClass: organization
o: Abdullah Alqahtani
dc: anq

# Engineering, anq.com
dn: ou=Engineering,dc=anq,dc=com
objectClass: organizationalUnit
objectClass: top
ou: Engineering

# Product, anq.com
dn: ou=Product,dc=anq,dc=com
objectClass: organizationalUnit
objectClass: top
ou: Product

# Financial Analysis, anq.com
dn: ou=Financial Analysis,dc=anq,dc=com
objectClass: organizationalUnit
objectClass: top
ou: Financial Analysis

# abdullah.alqahtani, Engineering, anq.com
dn: uid=abdullah.alqahtani,ou=Engineering,dc=anq,dc=com
objectClass: inetOrgPerson
objectClass: posixAccount
objectClass: shadowAccount
objectClass: top
uid: abdullah.alqahtani
sn: Alqahtani
givenName: Abdullah
cn: Abdullah Alqahtani
displayName: Abdullah Alqahtani
uidNumber: 10000
gidNumber: 5000
userPassword:: e1NTSEF9NXJhdnZXNTNwSHpNQ1VCUGpUeWYzVG5waDBHSHJwbjc=
gecos: Abdullah Alqahtani
loginShell: /bin/bash
homeDirectory: /home/abdullah.alqahtani

# mohammed.ahmed, Product, anq.com
dn: uid=mohammed.ahmed,ou=Product,dc=anq,dc=com
objectClass: inetOrgPerson
objectClass: posixAccount
objectClass: shadowAccount
objectClass: top
uid: mohammed.ahmed
sn: Ahmed
givenName: Mohammed
cn: Mohammed Ahmed
displayName: Mohammed Ahmed
uidNumber: 10001
gidNumber: 5000
userPassword:: e1NTSEF9NXJhdnZXNTNwSHpNQ1VCUGpUeWYzVG5waDBHSHJwbjc=
gecos: Mohammed Ahmed
loginShell: /bin/bash
homeDirectory: /home/mohammed.ahmed

# fatima.ali, Financial Analysis, anq.com
dn: uid=fatima.ali,ou=Financial Analysis,dc=anq,dc=com
objectClass: inetOrgPerson
objectClass: posixAccount
objectClass: shadowAccount
objectClass: top
uid: fatima.ali
sn: Ali
givenName: Fatima
cn: Fatima Ali
displayName: Fatima Ali
uidNumber: 10002
gidNumber: 5000
userPassword:: e1NTSEF9NXJhdnZXNTNwSHpNQ1VCUGpUeWYzVG5waDBHSHJwbjc=
gecos: Fatima Ali
loginShell: /bin/bash
homeDirectory: /home/fatima.ali

# search result
search: 2
result: 0 Success

# numResponses: 8
# numEntries: 7
Which indicates the creation of all records successfully.
With these steps completed, your environment is fully prepared, and you’re ready to start integrating LDAP authentication into your Laravel application.
Integrating OpenLDAP with Laravel using LdapRecord
LdapRecord is a powerful and efficient framework designed to simplify the process of integrating LDAP functionality into your PHP applications.
With LdapRecord, you can quickly establish a connection between your application and an LDAP server, enabling you to perform various LDAP operations with ease.
Whether you need to authenticate users, retrieve user attributes, or manage LDAP entries, LdapRecord provides a comprehensive set of tools and features to streamline the integration process.
By utilizing LdapRecord’s API and eloquent-like syntax, you can interact with LDAP directories easily, saving time and reducing the complexity of LDAP integration.
With minimal configuration and a developer-friendly approach, LdapRecord allows you to rapidly incorporate LDAP functionality into your PHP applications.
To install the package into your Laravel application (version 3 — latest)
$ composer require directorytree/ldaprecord-laravel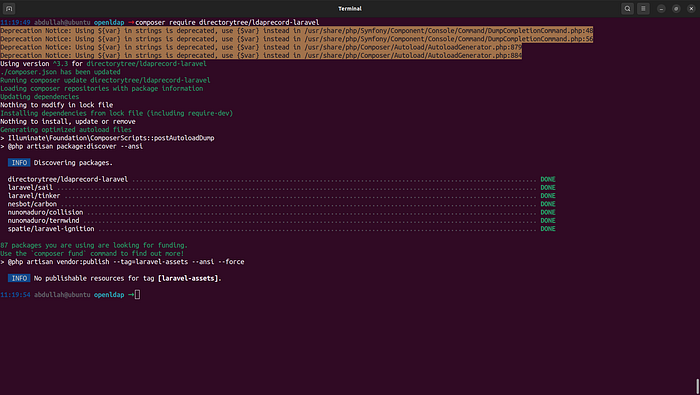
Please follow their documentation it’s well-written: https://ldaprecord.com/docs/laravel/v3/installation/
Now, we need to publish the configuration file for ldap.php by running the following command:
$ php artisan vendor:publish --provider="LdapRecord\Laravel\LdapServiceProvider"and we need to add these environment variables to our .env file
LDAP_CACHE=false
LDAP_LOGGING=true
LDAP_CONNECTION=default
LDAP_HOST=127.0.0.1
LDAP_USERNAME="cn=admin,dc=anq,dc=com"
LDAP_PASSWORD=anq
LDAP_PORT=389
LDAP_BASE_DN="dc=anq,dc=com"
LDAP_TIMEOUT=5
LDAP_SSL=false
LDAP_TLS=false
LDAP_SASL=false
Now, we need to test the connectivity by simply running the command
$ php artisan ldap:test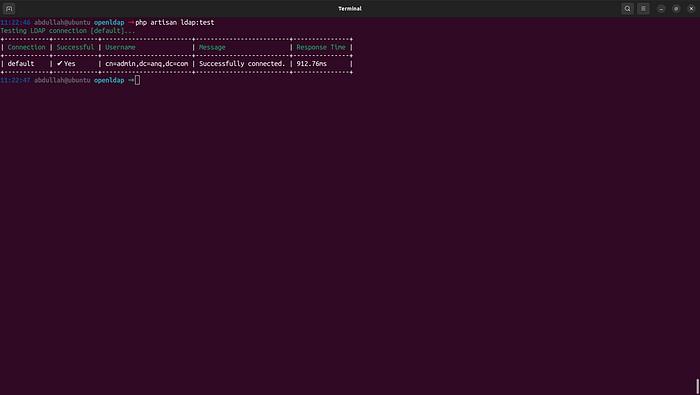
Now, we need to create a new model for the LDAP User
through running this command:
$ php artisan ldap:make:model User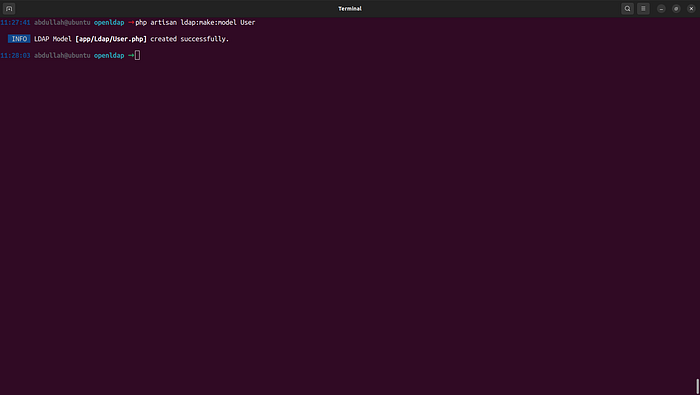
Once created, insert the following interface and trait onto the model:
Interface:
Illuminate\Contracts\Auth\AuthenticatableTrait:
LdapRecord\Models\Concerns\CanAuthenticateSo, it will be finally the following:
<?php

namespace App\Ldap;

use LdapRecord\Models\Model;
use LdapRecord\Models\Concerns\CanAuthenticate;
use Illuminate\Contracts\Auth\Authenticatable;

class User extends Model implements Authenticatable
{
  use CanAuthenticate;

  public static array $objectClasses = ['...'];

  protected string $guidKey = 'uuid';

  public function getAuthIdentifier()
  {
    // TODO: Implement getAuthIdentifier() method.
  }
}
Now, we need to change the provider array inside auth.php file
to this update array, and make sure to use
LdapRecord\Models\OpenLDAP\User::class
as also LdapRecords provides API for the ActiveDirectoryusing this class:
LdapRecord\Models\ActiveDirectory\User::class
'providers' => [
  'users' => [
    'driver' => 'ldap',
    'model' => LdapRecord\Models\OpenLDAP\User::class,
    'rules' => [],
    'database' => [
      'model' => App\Models\User::class,
      'sync_passwords' => false,
      'sync_attributes' => [
        'name' => 'cn',
        'email' => 'mail',
      ],
    ],
  ],
],
Now, I will import all my users which already exists into the
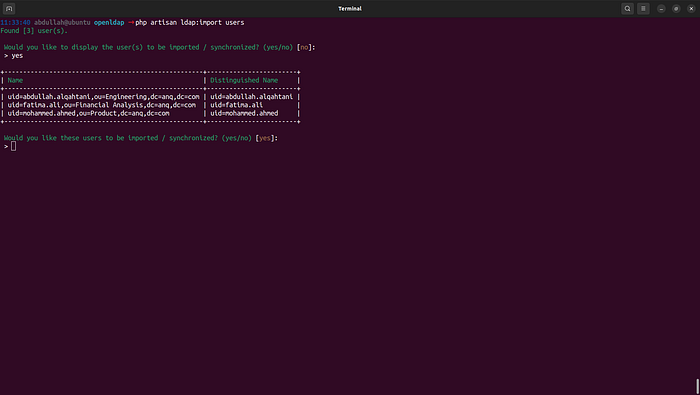
Now, all users are imported to the database!
Plain Authentication
Implementing plain authentication using LDAP in a Laravel application involves several steps. First, you need to ensure that the LDAP PHP extension is installed and enabled on your server.
$ sudo apt-get install php-ldapThen, install Laravel Breeze in your Laravel project using the command composer require laravel/breeze --dev. This will provide you with a basic authentication system out of the box. After installing Breeze, make sure to run the necessary migrations to set up the authentication tables in your database
Now, if you are using the database session driver, you must change the user_id column from its default type. This is due to LDAP Object GUID's being stored as the user's ID, which is not compatible with the unsigned big integer type:
From:
Schema::create('sessions', function (Blueprint $table) {
    // ...
    $table->foreignId('user_id')->nullable()->index();
    // ...
});
To:
Schema::create('sessions', function (Blueprint $table) {
    // ...
    $table->string('user_id')->nullable()->index();
    // ...
});
Login Request
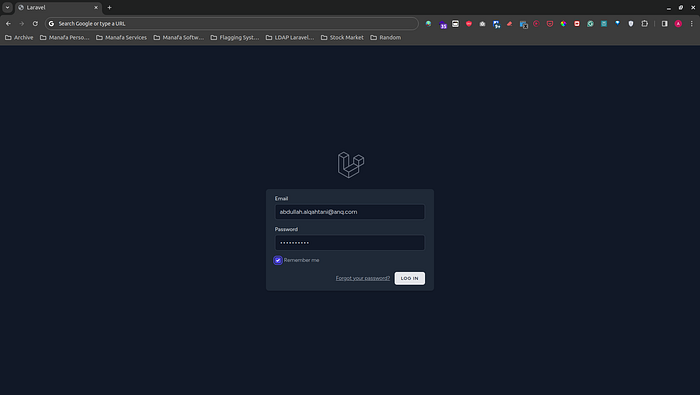
For this example application, we will authenticate our LDAP users with their email address using the LDAP attribute mail.
For LdapRecord to properly locate the user in your directory during sign in, we will override the authenticate method in the LoginRequest, and pass in an array with the mail key (which is the attribute we are wanting to retrieve our LDAP users by) and the users password:
// app/Http/Requests/Auth/LoginRequest.php/**
* Attempt to authenticate the request's credentials.
*
* @return void
*
* @throws \Illuminate\Validation\ValidationException
*/
public function authenticate()
{
$this->ensureIsNotRateLimited();
$credentials = [
'mail' => $this->email,
'password' => $this->password,
];
if (! Auth::attempt($credentials, $this->filled('remember'))) {
RateLimiter::hit($this->throttleKey());
throw ValidationException::withMessages([
'email' => __('auth.failed'),
]);
}
RateLimiter::clear($this->throttleKey());
}Blade Views
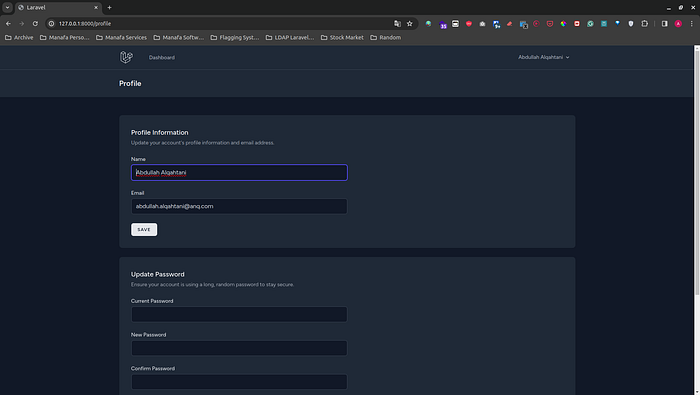
Once you have completed updating your LoginRequest.php class, you will then have to navigate to any Blade views that contain references to Auth::user(). Remember, when using plain authentication, LdapRecord models are returned, not Eloquent.
In the standard scaffolding, this occurs namely in the navigation.blade.php view:
From:
<!-- resources/views/layouts/navigation.blade.php -->{{ Auth::user()->name }} {{ Auth::user()->email }}{{ Auth::user()->name }} {{ Auth::user()->email }}To:
<!-- resources/views/layouts/navigation.blade.php -->{{ Auth::user()->getName() }} {{ Auth::user()->getFirstAttribute('mail') }}Now we are up and running with the LDAP authentication integrated into our Laravel application!


Security Concerns
When it comes to security, make sure to use LDAPS (LDAP over SSL/TLS) instead of plain LDAP. Use port 636 instead of 389, and obtain an SSL/TLS certificate from a trusted authority. Configure your Laravel app to verify the certificate to prevent attacks.
To test LDAP authentication, create test cases that cover different scenarios like valid and invalid credentials, user existence, and edge cases. Use Laravel’s built-in testing tools and mock the LDAP server if needed. Test thoroughly to ensure your implementation is working as expected.
If you encounter issues, double-check your LDAP server settings, Laravel configuration, and firewall rules. Make sure your LDAP server is reachable and responding correctly.
By following these security practices and conducting proper testing, you can ensure a secure implementation of authentication using LDAP in your application.
Conclusion
In this article, we learned how to integrate LDAP authentication into a Laravel application using OpenLDAP, phpLDAPadmin, Docker, and the LdapRecord package.
We set up an OpenLDAP server, configured phpLDAPadmin, and integrated LDAP authentication into our Laravel app step by step.
Now you should have a good understanding of how to use LDAP with Laravel for user authentication and management.
Remember to prioritize security by using LDAPS and proper testing.
If you have any questions or want to share your experiences, feel free.
The GitHub repo for this article can be found here:
